
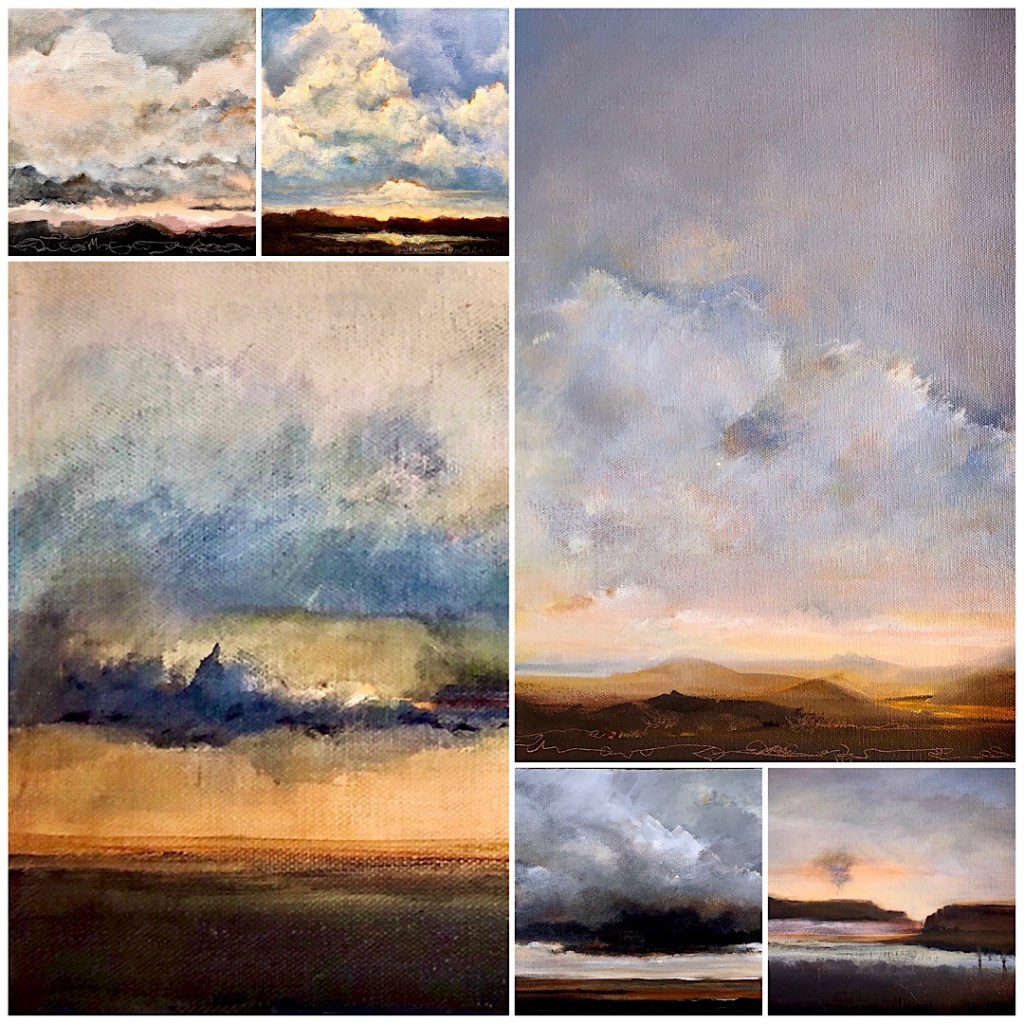
Painting, painting, painting! Life is good and the landscapes I painted in the past weeks have been delivered to the galleries… looking for a new home. Parts and pieces of some are collaged above. Tourism here in NM has been slowly picking up and, consequently, folks are taking home memories of their visits in the form of artwork…what a great choice.
Consequently, I wanted to complete a number of paintings to keep up and was lucky to have the canvases I needed to do this in my “art” closet (otherwise known as the guest room closet) so I made a plan. Having a process in the development of a complete piece, I found I could complete the first three steps on a few canvases at the same time, using my time wisely. Let’s go through a few.
The first step is to examine the canvas, make sure the stretcher bars are not warped, the corners are square and the canvas is stretched tightly. I usually have to improve the the stretch, making it tight as a drum…no little warps at the corners or bow in the center. I have an excellent technique for this, but that is for another post.
Next, even though the canvas comes with a coat of gesso, I apply two or three more coats to achieve a surface I like. I let each coat dry thoroughly and lightly sand before applying the next one. This exercise gives the painting a good start and, since I use a mix of black and white gesso, tones the canvas to a darkish gray.

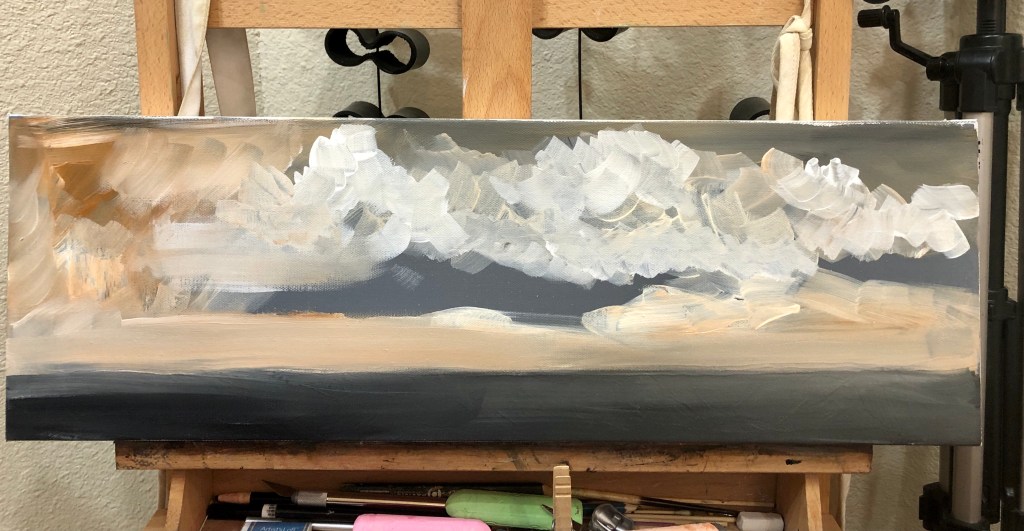
The canvas on the left has three coats of gesso and is a beautiful tone and the canvas on the right has been under-painted with a general layout for the clouds…the ground not touched, remaining the same gray undercoat. Sometimes the underpainting is more active as in the image below, and lends an energy to the piece…thoughts that can be changed along the way.
After the underpainting is dry, I add the hanging wire...for two reasons. I can place the painting on its face at this point and not worry about damaging anything and, once wired, I can hang it on the studio wall, look at it critically, and plan my next brushstroke. By completing these steps on three or four paintings, I can move from one to another, add a layer, let the paint dry, and make some decisions as to the final direction for each. If I get stuck, or just feel slow, this preparatory routine is not difficult, just time consuming, and can be done anytime even as other pieces are further along in the process.
These under-paintings have morphed into complete paintings previewed in the collage at the top of this post. Next week I will show you the finished painting and discuss the steps to get there.
How do you begin your paintings? We each have a favorite routine…thanks for reading a rather long post…from the studio

