

I took a few photos of the steps involved in creating this piece. The process is straightforward once I select the color palette for the thread and practice stitch a few combinations with a focus on getting the perfect color and the perfect tension on my machine to achieve the look I want.
I tried a new (to me) water soluble fabric on this piece. I like that it is white as opposed to the more transparent film I have been using. I can draw my design before I stitch and can see it clearly…a BIG plus. I have a few more fabrics to try, but I think this one will remain as a contender.
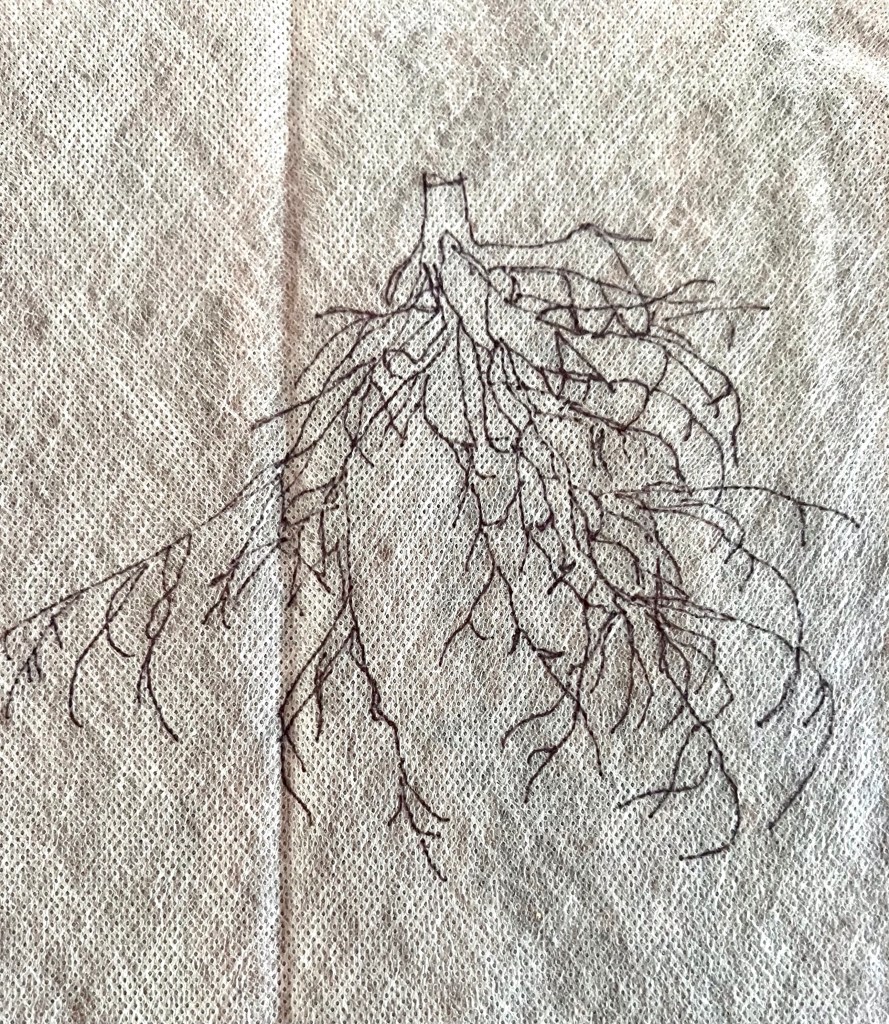
In the following image, I free motion stitched and then looked very closely to see where I missed connecting the stitches well. I mark those places with the arrows so I can stitch over all the first layers of stitching, but concentrate on multiple stitching lines in those marked places so that the piece will not fall apart.

After I stitch and inspect again…and maybe again…I place the entire piece in a bowl of water and let the fabric dissolve, leaving the skeleton of thread. It’s then time to shape the piece while it is wet, pinning it in multiple places. As it dries, the shape will have some memory and will be easier to mount in its final position.
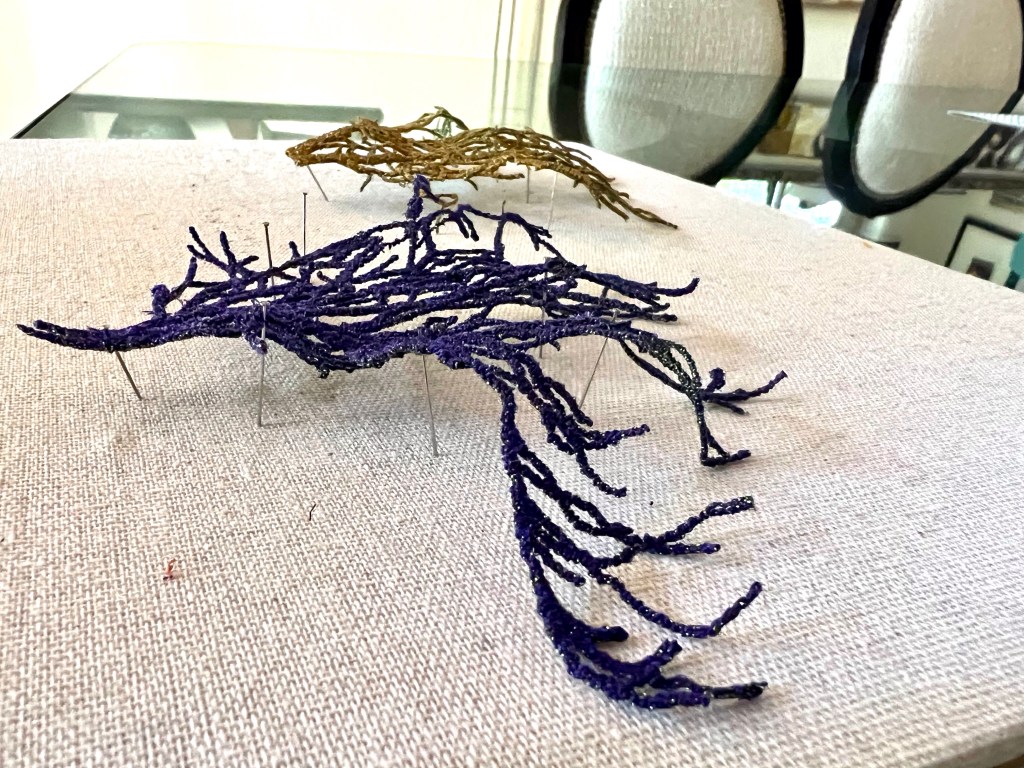
I mount the final thread sculpture (as seen in the first image) on fewer pins of different lengths to keep the shape and to produce beautiful shadows when the sculpture is viewed in the light. Tada!…from the studio

